How to Configure the Facebook Conversions API with Shopify

If you have followed our posts and social lately, you most likely have seen a large amount of content around the Facebook Conversions API. In this post, we want to share the initial connection of the Conversions API to your Shopify storefront.
The Conversions API is a supplementary way to track user activity and events to the Facebook pixel. Think of it as a safety net to ensure you do not lose tracking accuracy as we face a degraded pixel world. Google and Apple are limiting their browser cookie compatibilities, so setting up a server-side tracking method is vital for the future, starting right now.
Luckily for all of you Shopify store owners, one of the first Native integrations of the Conversions API came from the e-commerce CMS giant. The Facebook App within Shopify has always existed for the pixel, but the option to turn on the Conversions API is new as of October 2020.
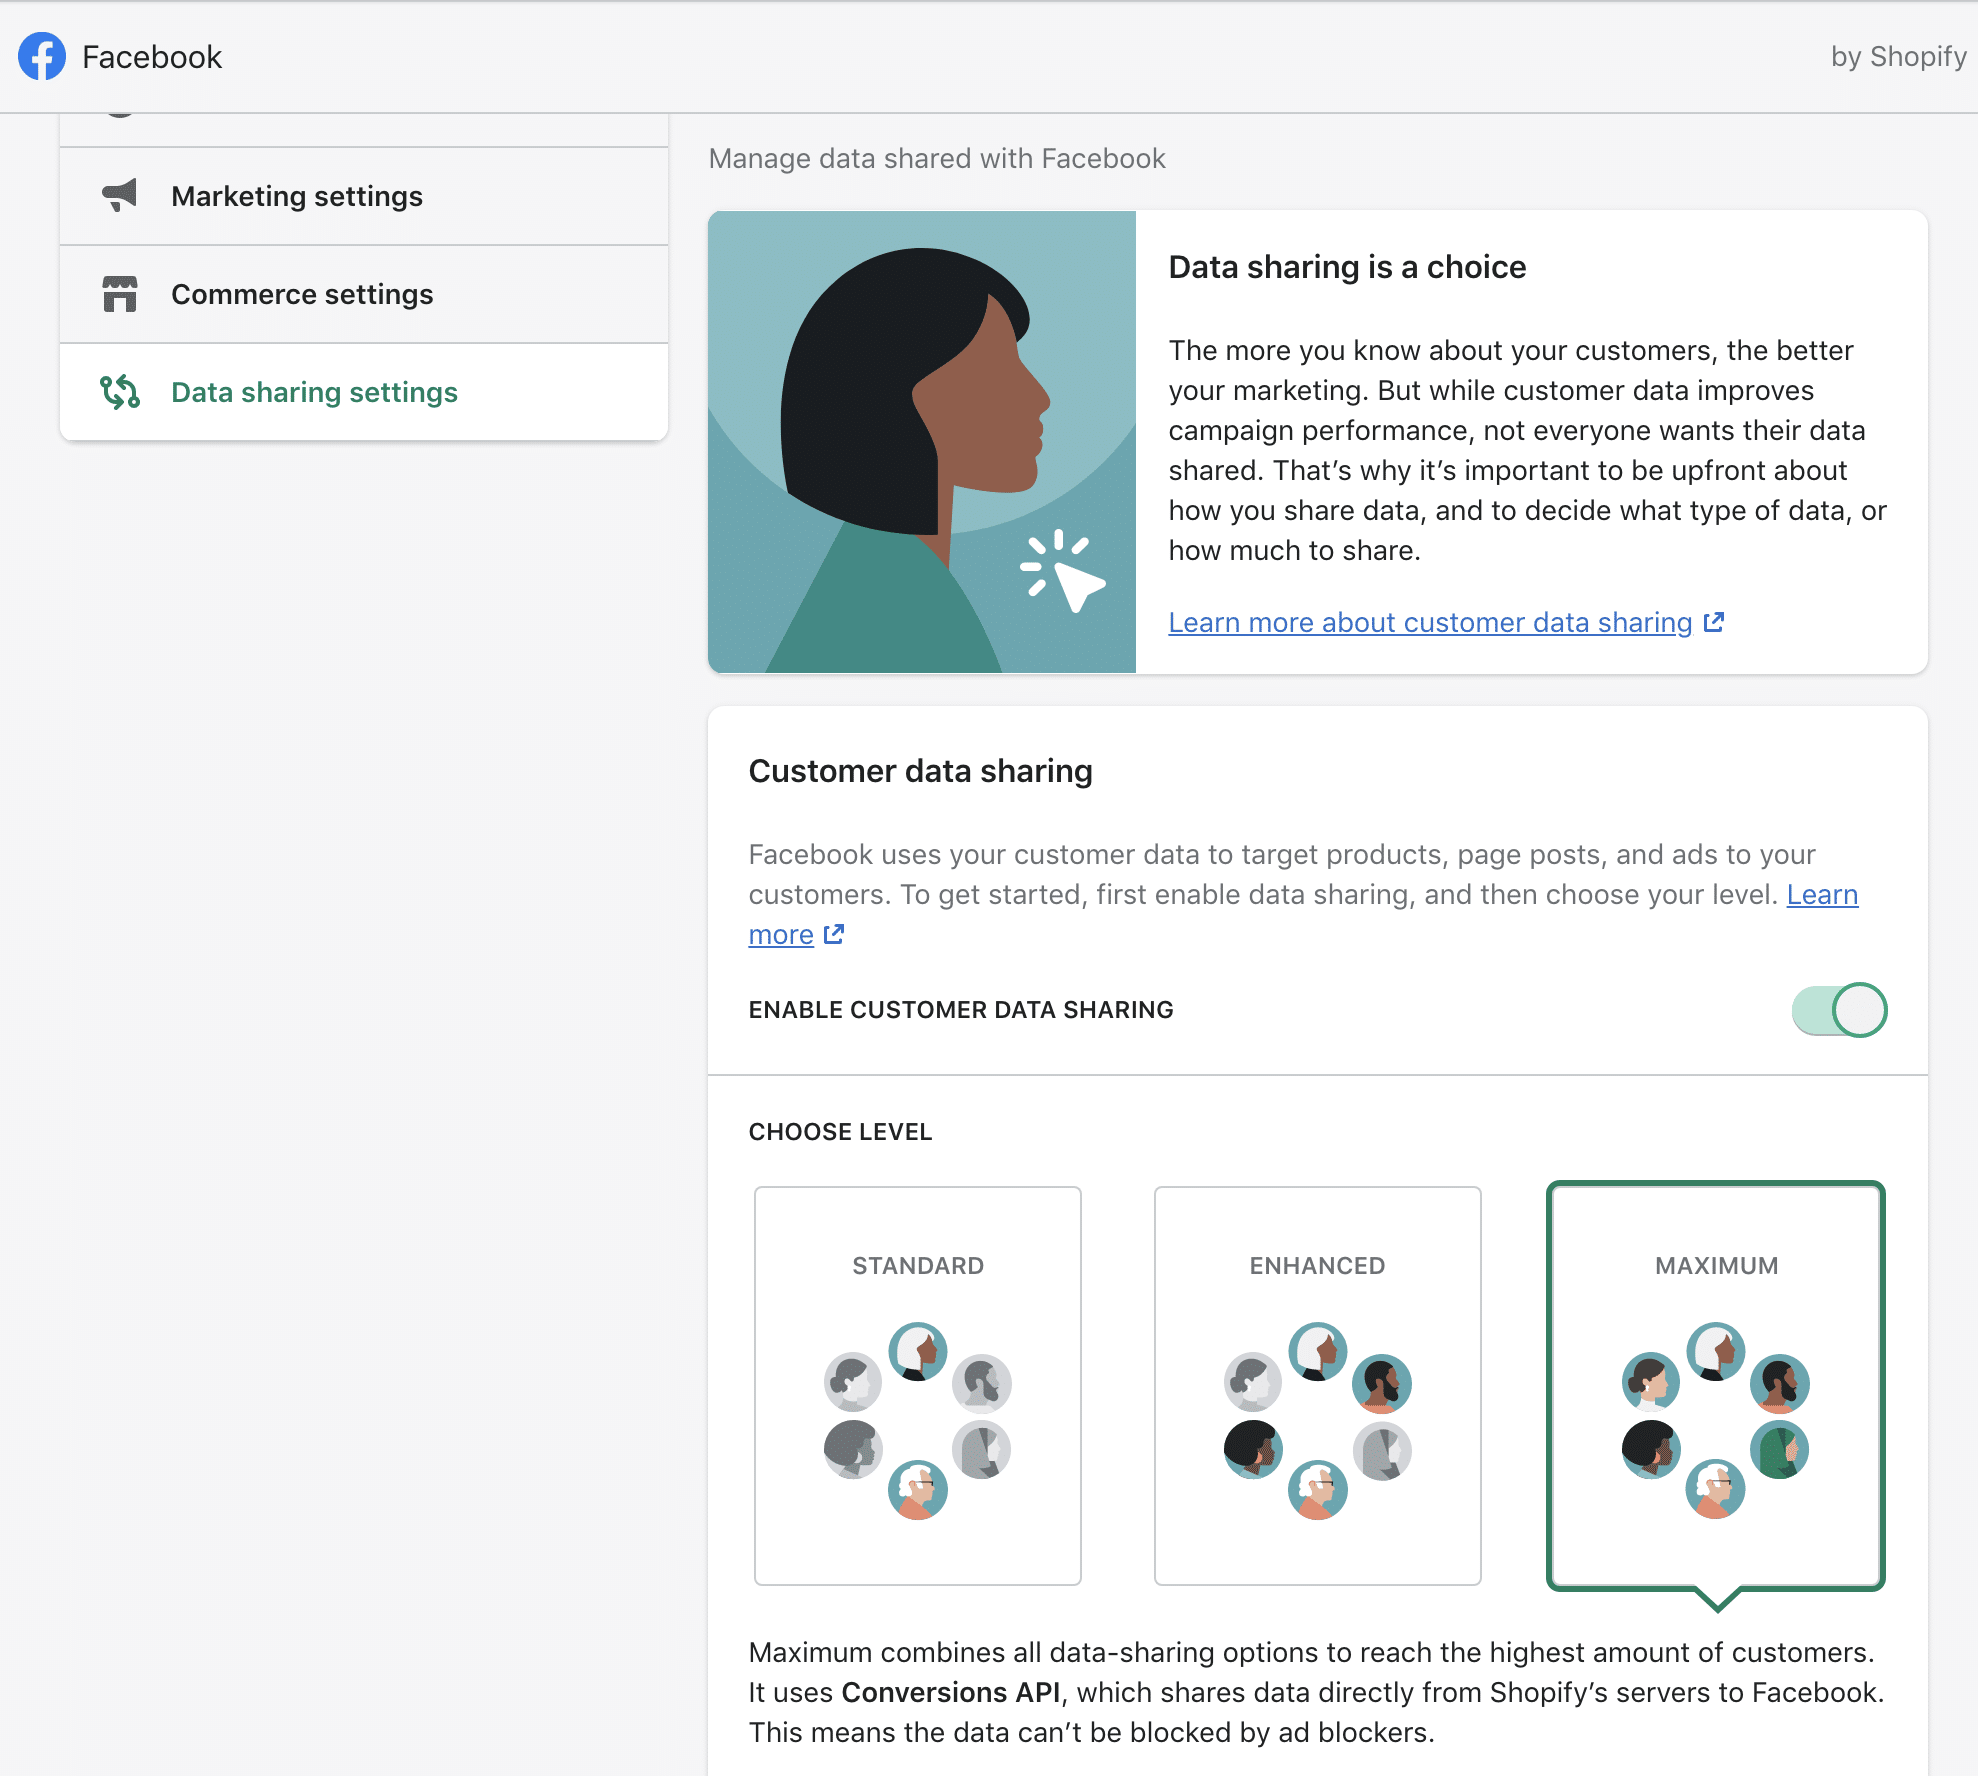
There are currently 3 different options to choose from on data sharing within the Facebook App:
- Standard: Standard uses Facebook Pixel, a third-party cookie that collects and shares customers’ browsing behavior on your online store. Browser-based ad blockers can prevent the pixel from collecting data.
- Enhanced: Enhanced uses Advanced Matching, which shares personal information about your customers, including name, location, and email. This pixel also shares customer browsing behavior on your online store. Browser-based ad blockers can prevent the pixel from collecting data.
- Maximum: Maximum combines all data-sharing options to reach the highest amount of customers. It uses Conversions API, which shares data directly from Shopify’s servers to Facebook. This means the data can’t be blocked by ad blockers.
The setup here is easy – just make sure you have the Facebook Shopify App connected and follow these steps:
- Choose the Facebook Page Shop option, start setup
- Connect your Facebook account using an Admin permission account
- Connect your Facebook Business Manager using an Admin permission account
- Connect your designated Facebook page to your store
- Configure and turn on pixel tracking
- Create or connect a Facebook Commerce Account in the setup wizard
- Go to the Settings page of the Facebook App, navigate to the data sharing tab
- Choose “Maximum” option
And that’s it. This now sets you up with the most basic version of the Conversions API and Shopify. If you are looking to expand on the data you collect, Power Digital can help! Reach out to us today.
Our Editorial Standards
Reviewed for Accuracy
Every piece is fact-checked for precision.
Up-to-Date Research
We reflect the latest trends and insights.
Credible References
Backed by trusted industry sources.
Actionable & Insight-Driven
Strategic takeaways for real results.


