Learning How To Use Photoshop: A Series
This post is the first installment of an ongoing series of learning-based workshops that are designed to help beginners interested in learning Adobe’s most popular application – Photoshop. We will start with the very basics such as:
- Adobe Suite
- When/why to use Photoshop
- Getting started
- Key application features
We will then move on to more advanced learning that will revolve around the strategy and execution of specific assignments that can be applicable to your job or business, the tools to use, and overall approach to creating professional work. The goal of this article is to help answer questions that everyone has while getting started as well as clarify information that is key to understand prior to starting any projects.
As a young professional in the digital age, it is important to have multiple skill sets across many disciplines in order to stand out. Often times, creative development is the missing link that requires outside help. You’d be amazed with how effective you can be with a very basic understanding of Adobe software. Photoshop (in many designers’ opinions) is the best place to start before moving on to Adobe’s other applications. While there are many photoshop elements to learn, it’s important you understand the foundational tools before diving into the more advanced features. Below, I’ll be covering the basics of how to use photoshop so you can start developing your creative skillset.
Tip: Develop a plan of recurring projects to practice what you learn. No matter how many tutorials watch, actually applying this knowledge is where you will learn the most.
When To Use Photoshop
Photoshop is one of many applications in the Adobe Creative Suite. Generally speaking, It is a pixel-based program and is best used for creating, editing and enhancing photos. There are many uses for the program, but the primary functions of photo editing include:
- Retouching Photos – There is no better tool than Photoshop to retouch photos. This is the place to go to color correct, digitally enhance, or even remove certain sections of an image. Photoshop’s layer features and adjustment tools are very flexible.
- Editing Artwork – Whether it’s for digital or print, Photoshop has thousands of features that will allow you to design and edit photos, drawings, paintings, artwork, or anything else in ways that no other adobe program is capable of.
- Digital Images for the Web – Social media imager and ads, banner ads, email headers, videos, etc. Using Photoshop tools will ensure that all the image editing you do will be the right size, dimensions, and optimized for digital use.
- Website Mockups – The Photoshop layer tool makes it easy to design and organize your mockups. Plus, since it is a pixel-based program everything is already designed to the correct size and proportional to your website.
There is no doubt that Illustrator and InDesign have their specialties, but you can technically accomplish more using Photoshop that you wouldn’t necessarily be able to get away with in Illustrator or inDesign.

Getting Started
Digital vs. Print
When using Photoshop, you are typically designing for either digital or print. Both have specifications for resolution in the form of dots per inch (dpi). The dpi affects the clarity of the file as well as the file size:
- Digital (web) – 72 dpi: Good resolution, smaller file size
- Print – 300 dpi: Higher resolution, larger file size
Common File Types
Photoshop:
- File type ending .psd
- Editable design file
JPEG:
- File type ending in .jpg
- Usually used for photographs on the web
- Smaller file size – faster load speeds on website
PNG:
- File type ending in .png
- Ability to remove background and isolate objects
- Preferred for logos
- Larger file size
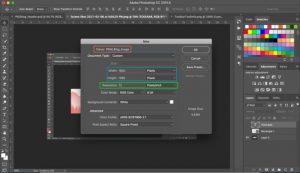
Creating a New Project
When you attempt to open a new document, you are always prompted with a window to fill out your specifications for the project. You have the choice to work in pixels, inches, centimeters, and many others. Since Photoshop is designed for both print and web, you want to be sure you are setting up your projects using the correct parameters:
- Web projects: Pixels
- Print: Inches (US) or centimeters/millimeters (World)
Layers
Layers are the foundation of Photoshop. The concept behind layers is to create the freedom to edit, move, hide, delete and arrange each object (layer) individually (or together) without affecting other layers. Having a thorough understanding of how to work with your layers in every project is considered one of the most important places to start before mastering the toolbar, adjustment layer options, etc. You will prevent a lot of confusion and frustration the sooner you become comfortable in this layers panel.
We suggest developing a habit of keeping your layers panel organized, grouped, and labeled as it will allow you to work a lot more efficiently.
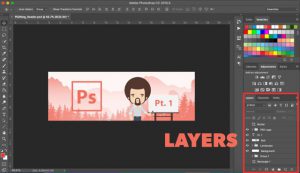
Tip: Using the Move Tool (V), right-click on an object or element of your project to reveal and select a specific layer. This comes in handy when you work on projects with a high quantity of layers. Watch this tutorial from the Adobe CC team on Layers.
The Toolbar, Keyboard Shortcuts And Commands
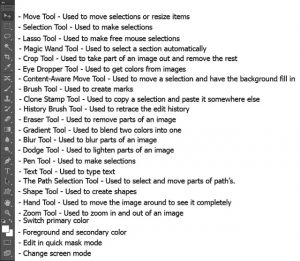
The Toolbar
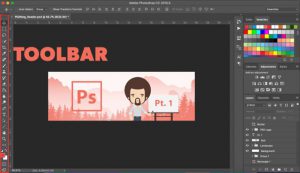
Located on the left side of your workspace, your Photoshop toolbar is what allows you to complete just about any project you’re working on.
Similar tools are grouped together, but only one icon is showing. Click and hold down on the icon to display all the tools in the group. Each tool has a keyboard shortcut associated with it (letter on the right of the tool’s name).
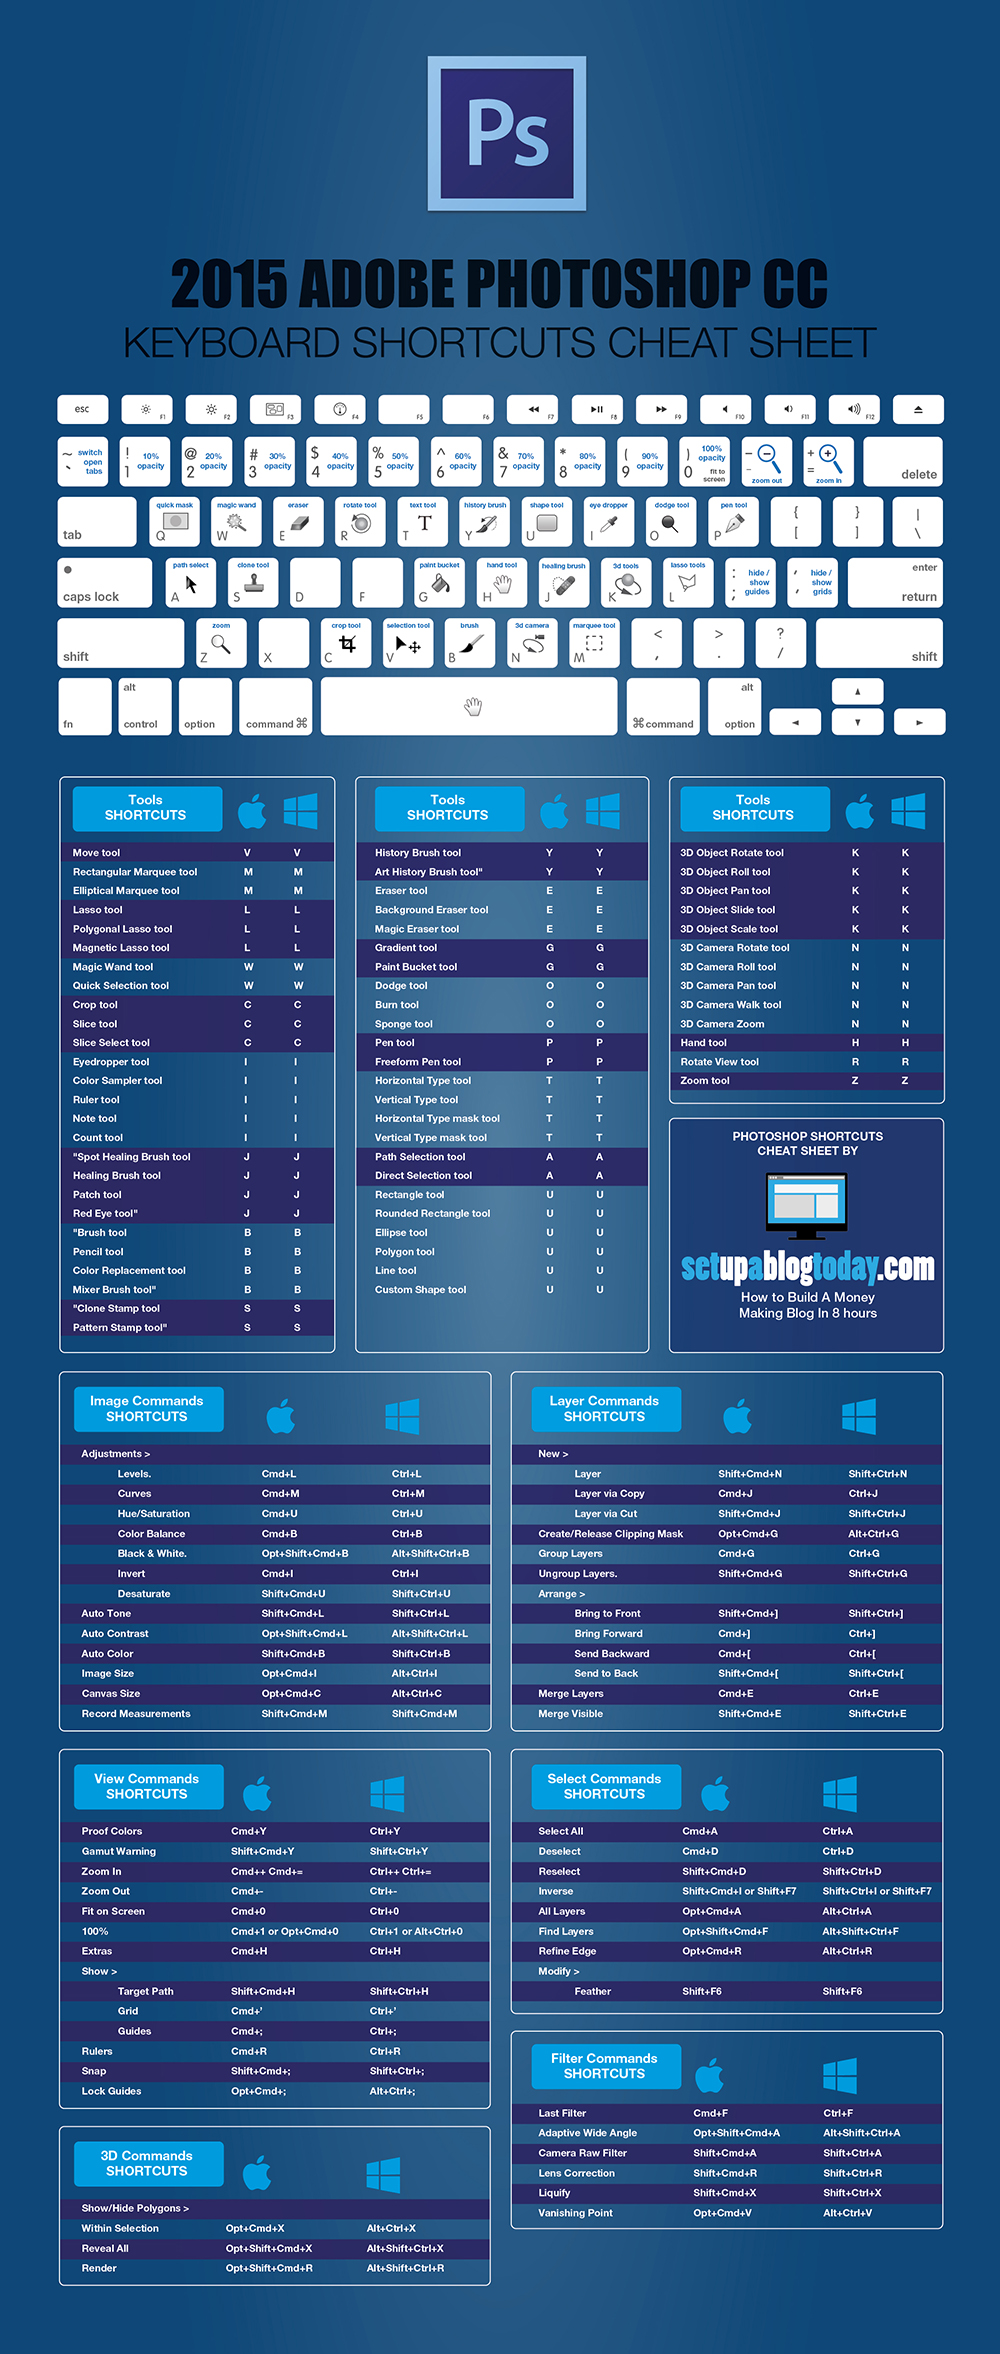
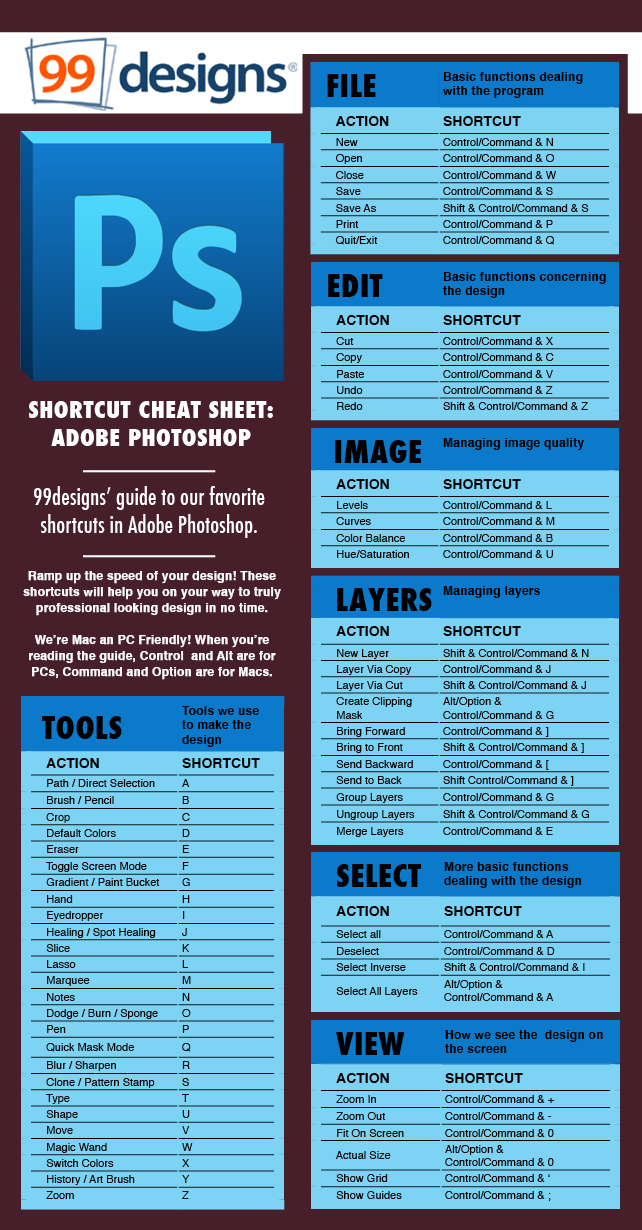
Keyboard Shortcuts
Keyboard shortcuts are your best friend. If you have ever watched an experienced designer work in Adobe, you will notice how fast and efficient they work using their keyboard to switch between tools and perform commands. The sooner you learn these, your productivity and efficiency within the program will increase tenfold.
Common Keyboard Shortcuts:
- V – Move Tool
- T – Type Tool
- I – Eye Dropper Tool
- W – Quick Select Tool
- M – Marquee Tool
- C – Crop
- ] – increase brush size
- [ – decrease brush size
Commands
Common Commands:
- Cntrl + s: Save
- Cntrl + Shift + s: Save for Web
- Cntrl + z: Redo (1 step)
- Cntrl + alt + z: Redo (Steps 2+ in history)
- Cntrl + t: Transform
- Cntrl + r: Show/Hide Rulers
Tip: Download, print, and study this guide as a helpful resource.
Tip: Hold shift when using the transform command to resize objects proportionally or draw/erase/move in straight lines.
Free Resources
- Free Tutorials: YouTube – Anything you want to learn, there are hundreds of tutorials for FREE. YouTube is hands down the most useful resource to learn (other than this blog series) how to execute just about anything in the platform.
- Free Stock Images: Unsplash – Pexels – Pixabay
- Free Vector Shapes & Icons: www.flaticon.com
- Free Fonts: dafont – FontSquirrel – 1001fonts
- Free Cheat Sheet
Check back for any updates, added information, or resources that we feel would be a helpful addition to this post. Adobe Creative Suite is a very complex software with endless amounts of possibilities. We want to make sure that we cover as much as possible and provide you, the reader, with as much helpful information to kick off your training.
Stay tuned for the next installment of this series in which we will cover more preliminary information while getting started on tips and tricks revolving around the execution of projects that will help you at your job and/or your business.
“The secret to doing anything is believing that you can do it. Anything that you believe you can do strong enough, you can do. Anything. As long as you believe.” – Bob Ross


